Gardening Green with Doug
The Easy Way to Grow Microgreens at Home Year-Round
By Doug Oster
January 5, 2021
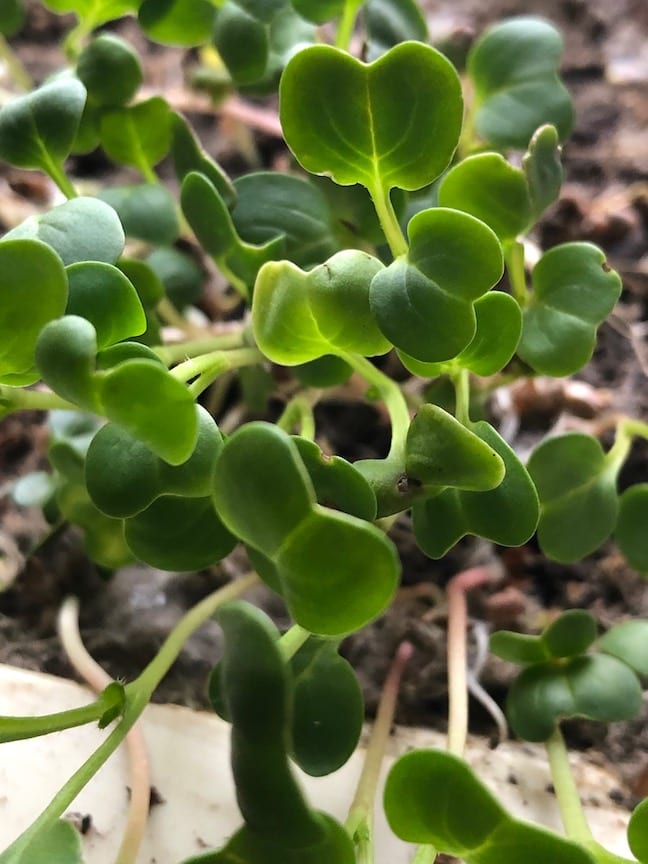
It only takes a few days to observe tiny radish seeds begin to unfurl in the soft morning light coming through the bedroom window. Watching the magic of seeds sprouting never gets old. The tiny seedlings of the radish are harvested as microgreens in a week or so. They are highly nutritious, sweet and tender. Everything from the thin red root up to the top of the plant is edible — and tasty too!
Growing microgreens is easier than planting a Chia Pet. If you’re looking for a garden project that’s foolproof and fun, give it a try. Radishes are a great vegetable to start with, but there are lots of other seeds that produce tasty microgreens. Sunflowers, beans, basil, cole crops like broccoli and kale, spinach, peas, leeks, bunching onions, lettuce, greens, herbs — lots will work.
When sprouting seeds in water, the varieties need to be labeled specifically for that purpose. When using planting mix, any seeds are fair game. Search any good garden shop for old seeds on sale before the new varieties start filling up the racks this year. You might even have some seeds sitting around that would work fine.
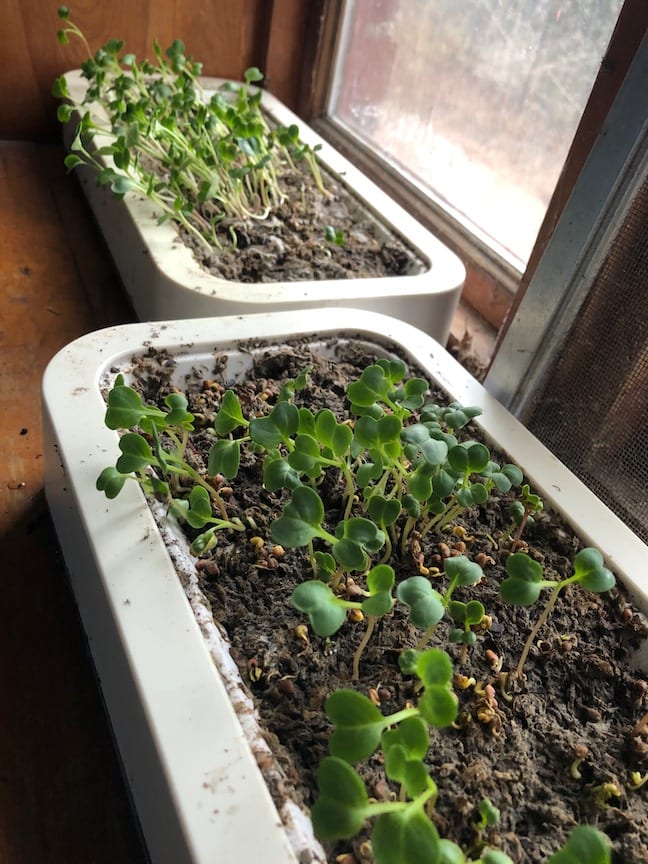
In my operation, I’ve got two Chef’n Microgreen Growing Kits, but any container with drainage will work. But this little kit is a perfect size and doesn’t make a mess on the windowsill. I fill the pot with moistened planting mix, which can be found at any good nursery or garden center. The mix should be combined with water in a separate container, like a tub. To test for the correct consistency, squeeze the mix. It should stick together, but not drip.
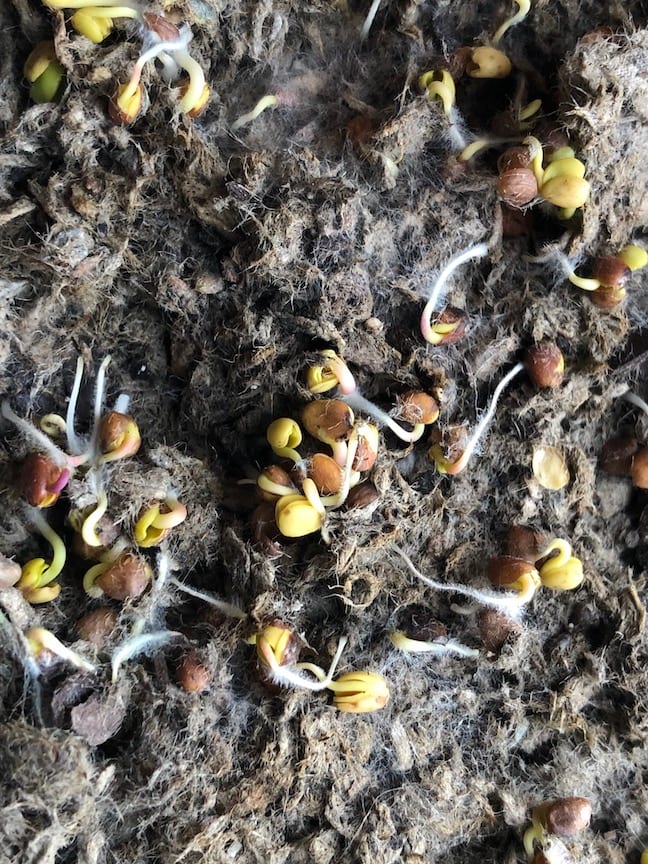
Sprinkle the seeds on top of the mix, but don’t worry about the spacing. We’re creating a carpet of greens. Take some more moist mix and lightly cover the seeds. Gently push the mix down on the seeds to make sure it makes contact with the seeds.
Cover the whole container with clear plastic. The mixture must stay moist until germination.
Once the seeds sprout, remove the plastic. They can be harvested in just a few days.
For root crops like radishes, I like to pull the whole plant, rinse it off, and then decide how to use it in the kitchen. The greens are great on sandwiches but can be thrown into salads or eaten as is.
For sunflowers, beans and many of the other crops, I’ll just cut them with scissors. Sometimes the leafy greens will sprout again for a second harvest. They will all last for a week or two in the fridge but are best fresh.
Like anything from the garden, these little greens are unmatched in nutrients and flavor.
With two different containers going, one will be harvested as the other is being planted. It assures something to harvest all winter long.
There’s no special lighting needed since the microgreens are only growing for a week or two. The pot should be turned towards the light every couple of days, as the sprout will reach and lean towards the light.
I have fantasized though, about a six-foot-long table under lights in the basement with a few flats filled with delicious greens.
Nothing could be simpler than planting a few packets of seeds inside and enjoying fresh produce until it’s time to plant the spring garden.
[…] Try microgreens for winter, windowsill gardening. […]
[…] for one more fun winter gardening project? How about planting and eating some microgreens? Here’s how it’s done, from a previous Green Voice […]